GRAPHIC DESIGN

How to Start Your Graphic Design Journey: A Step-by-Step Guide

Graphic design is a creative and rewarding field that combines art, technology, and problem-solving. Whether you’re looking to start a new career, enhance your creative skills, or pursue a hobby, this guide will walk you through the essential steps to begin your graphic design journey.

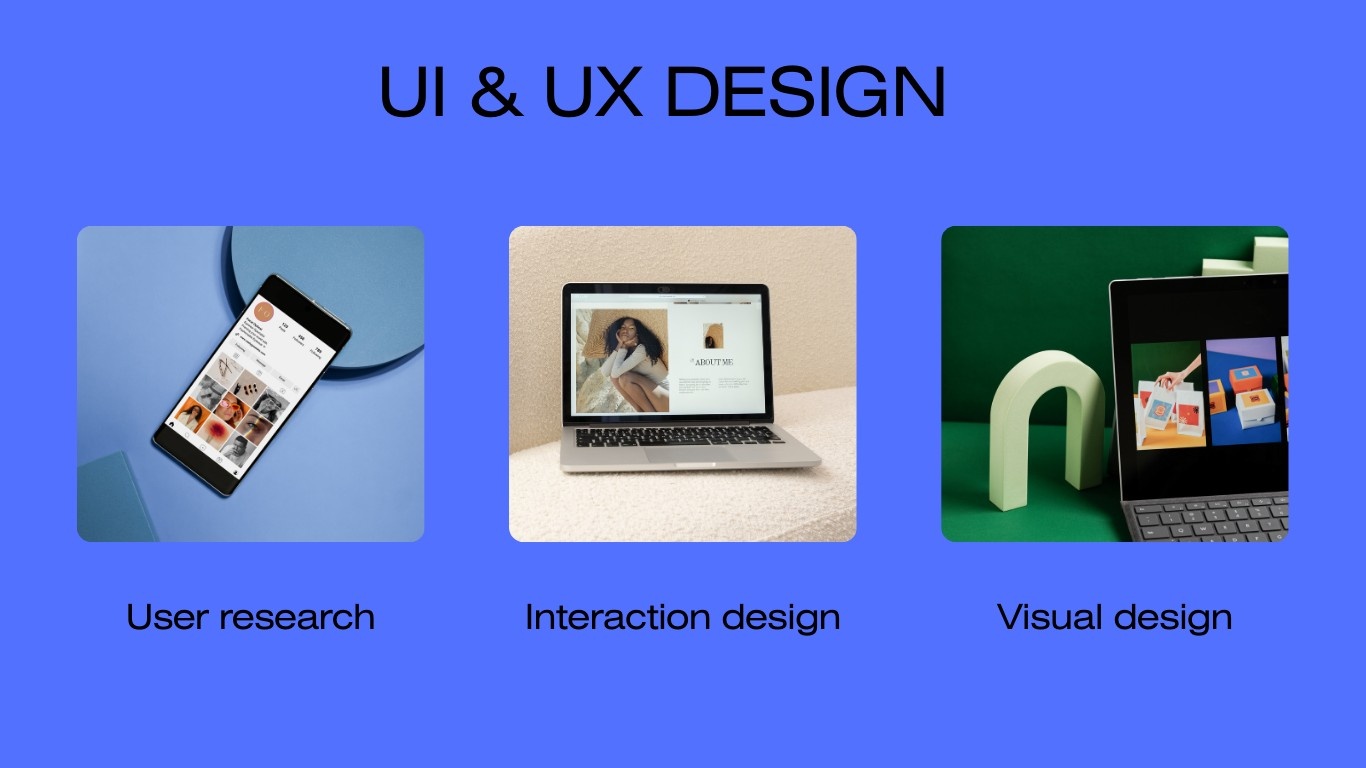
Step 1: Understand What Graphic Design Is

Before diving into design, it’s crucial to understand what graphic design entails. Graphic design is the process of visual communication through the use of typography, imagery, color, and layout to convey a message or solve a problem. Designers work in various industries, including advertising, digital media, branding, web design, and more.

Step 2: Set Clear Goals

Determine why you want to learn graphic design. Are you aiming to become a professional designer, improve your business’s visuals, or explore a creative hobby? Setting clear goals will guide your learning path and keep you motivated.

Step 3: Learn the Fundamentals

Graphic design has foundational principles that you need to learn, including:

Color Theory: Understanding colors, contrasts, and how colors influence emotions.

Typography: The art of arranging text and choosing the right fonts.

Composition & Layout: How to arrange elements harmoniously.

Design Principles: Balance, hierarchy, alignment, proximity, repetition, contrast, and space.

Step 4: Choose Your Design Tools

Familiarize yourself with popular graphic design software:

Adobe Creative Cloud: Photoshop, Illustrator, InDesign (industry standard).

Free Alternatives: GIMP, Inkscape, Canva, and Gravit Designer.

Vector vs. Raster Tools: Learn when to use vector graphics (Illustrator) versus raster images (Photoshop).

Step 5: Take Online Courses & Tutorials

There are many free and paid resources to learn graphic design:

Online Platforms: Udemy, Coursera, Skillshare, YouTube, and LinkedIn Learning.

Books: “Thinking with Type” by Ellen Lupton, “The Design of Everyday Things” by Don Norman.

Step 6: Practice, Practice, Practice

Start practicing by working on small projects. Redesign logos, create social media posts, or design posters. The more you practice, the more your skills will improve.

Step 7: Build a Portfolio

Your portfolio is a showcase of your best work. Include diverse projects that highlight your design skills. You can create a digital portfolio using platforms like Behance, Dribbble, or even a personal website.

Step 8: Seek Feedback & Iterate

Share your designs with other designers, mentors, or online communities. Constructive feedback will help you identify areas of improvement and grow as a designer.

Step 9: Stay Inspired & Keep Learning

Design trends and tools evolve constantly. Follow design blogs, attend webinars, and connect with the design community to stay updated.

Conclusion

Starting your graphic design journey can be both exciting and challenging. By following these steps, setting goals, and consistently practicing, you can develop the skills needed to create visually appealing and effective designs. Embrace the learning process and enjoy the creative journey ahead!

HOW TO

How to

Step-by-Step Guide on How to Do Anything Efficiently
Mastering any task, whether simple or complex, requires a structured step-by-step approach. Breaking down a process into manageable steps ensures clarity, efficiency, and success. Below is a universal framework to accomplish any task systematically.

Step 1: Define Your Goal
Before starting, clearly identify what you want to achieve. A well-defined goal helps maintain focus and direction.

βœ… Ask yourself:

What is the final result I want?
Why am I doing this?
What problem does this solve?
πŸ”Ή Example: If your goal is to learn a new language, specify whether you want basic conversational skills or full fluency.

Step 2: Gather Necessary Information & Resources
Understanding the process and collecting the right materials will make the task easier.

βœ… Research and prepare:

Read tutorials, watch videos, or take courses.
Gather necessary tools, software, or equipment.
Learn from experts or seek mentorship.
πŸ”Ή Example: If you want to start a blog, you’ll need a domain name, hosting, and a content plan before setting up a website.

Step 3: Break Down the Process into Smaller Steps
Dividing a big task into smaller, actionable steps makes it more manageable.

βœ… Create a structured plan:

List out each step in a logical order.
Set milestones or deadlines.
Prioritize based on importance and dependencies.
πŸ”Ή Example: If your goal is to write a book, break it down into brainstorming, outlining, drafting, editing, and publishing.

Step 4: Take Action and Execute Each Step
Once you have a plan, start working on each step systematically.

βœ… Maintain focus by:

Completing one step at a time.
Avoiding distractions and multitasking.
Staying consistent and dedicated.
πŸ”Ή Example: If learning to code, start with the basics (HTML & CSS), then move on to JavaScript and advanced frameworks.

Step 5: Review and Improve
After completing the steps, assess your work and identify areas for improvement.

βœ… Ask for feedback:

Test your results (e.g., run a prototype or review performance).
Learn from mistakes and adjust accordingly.
Make necessary refinements before finalizing.
πŸ”Ή Example: If you’re designing a website, test for user-friendliness and optimize loading speed before launch.

Step 6: Maintain & Upgrade
Many tasks require ongoing effort for long-term success.

βœ… Regularly update, improve, or expand:

Keep learning and refining your skills.
Upgrade tools or techniques to stay relevant.
Adapt to changing trends or new challenges.
πŸ”Ή Example: If you run an online store, continuously update your products, improve customer experience, and analyze sales data.

Conclusion
By following these structured step-by-step guidelines, you can effectively learn, create, or accomplish anything efficiently. Whether it’s starting a project, mastering a skill, or solving a problem, a systematic approach ensures clarity, progress, and success.

UI&UX DESIGN

UI & UX Design: A Complete Guide
Introduction to UI & UX Design
UI (User Interface) and UX (User Experience) design are essential for creating digital products that are both visually appealing and user-friendly.

UI Design focuses on the aesthetics and interactivity of a product.
UX Design ensures that the product provides a seamless and enjoyable experience for users.
A well-designed UI/UX leads to higher user engagement, retention, and satisfaction.

Difference Between UI & UX Design
Feature UI Design UX Design
Focus Visual elements (colors, typography, layout) User experience, navigation, and functionality
Tools Figma, Adobe XD, Sketch User research, wireframing, prototyping
Goal Create aesthetically pleasing interfaces Ensure intuitive, user-friendly interactions
Output Buttons, icons, typography, color schemes Wireframes, prototypes, usability testing
UI and UX work together to create an effective digital experience.

Step-by-Step Guide to UI & UX Design
Step 1: Research and Planning (UX Design)
Before designing, it’s essential to understand the users, their needs, and the business goals.

βœ… User Research:

Conduct surveys and interviews.
Analyze user behavior with heatmaps (Hotjar, Crazy Egg).
Identify pain points and expectations.
βœ… Competitor Analysis:

Study similar products to identify best practices.
Discover gaps and opportunities in the market.
βœ… Define User Personas:

Create profiles of ideal users, including demographics, behaviors, and needs.
βœ… Information Architecture (IA):

Organize content and navigation structure.
Use tools like Sitemaps to plan the flow.
Step 2: Wireframing & Prototyping (UX Design)
Wireframing is the blueprint of the product, defining its structure without visuals.

βœ… Wireframing Tools:

Figma
Adobe XD
Sketch
Balsamiq
βœ… Prototyping:

Create interactive prototypes to test user flows.
Gather feedback from stakeholders before the final design.
Step 3: UI Design (Visual Elements & Branding)
UI design focuses on aesthetics and interactivity.

βœ… Key UI Elements:

Color Theory: Choose colors that evoke emotions and maintain consistency.
Typography: Select readable fonts with a clear hierarchy.
Buttons & Icons: Design interactive elements with proper spacing.
Imagery & Illustrations: Use visuals that enhance understanding.
βœ… Popular UI Design Tools:

Figma
Adobe XD
Sketch
Canva (for quick design elements)
Step 4: Usability Testing & Feedback (UX Design)
Testing ensures the design meets user expectations.

βœ… Usability Testing Methods:

A/B Testing: Compare two versions of a design.
Eye-tracking: Identify areas users focus on the most.
User Feedback: Conduct surveys and collect insights.
βœ… Tools for Testing:

Hotjar
Google Analytics
Maze
UserTesting.com
Step 5: Implementation & Handoff to Developers
Once the UI/UX design is finalized, it’s shared with developers.

βœ… Design Handoff Tools:

Figma & Zeplin (Generate design specs for developers).
Adobe XD & InVision (Interactive prototypes with code snippets).
βœ… Collaboration:

Work closely with developers to ensure the design translates well into the final product.
Step 6: Launch & Continuous Improvement
Even after launch, UI/UX design is an ongoing process.

βœ… Monitor Performance:

Use Google Analytics & Mixpanel for user insights.
Track user interactions to identify usability issues.
βœ… Iterate & Improve:

Gather user feedback.
Regularly update the design based on trends and technology advancements.
Best Practices for UI/UX Design
βœ” Keep it Simple: Avoid clutter and unnecessary elements.
βœ” Be Consistent: Maintain uniform typography, colors, and button styles.
βœ” Use White Space: Improve readability and focus.
βœ” Prioritize Mobile Design: Ensure a responsive experience.
βœ” Test Early & Often: Regular testing prevents major design flaws.

Conclusion
A great UI/UX design enhances user engagement, improves usability, and drives conversions. By following a user-centric approach, designers can create digital experiences that are both beautiful and functional.

SOFTWARE DEVELOPMENT

Step 1: Understanding Software Development
Software development is the process of designing, coding, testing, and maintaining applications or systems. It follows structured methodologies such as Agile, Waterfall, or DevOps.

Key Components:
Frontend: User interface (UI) and experience (UX) (e.g., HTML, CSS, JavaScript).
Backend: Server-side logic and database management (e.g., Python, Java, Node.js).
Database: Data storage and retrieval (e.g., MySQL, PostgreSQL, MongoDB).
DevOps: CI/CD, cloud deployment, and automation (e.g., Docker, Kubernetes).
Step 2: Planning and Requirement Analysis
Before development starts, clear requirements and a roadmap are essential.

Key Activities:
Gather Requirements – Understand user needs, functionality, and business objectives.
Create a Software Requirement Specification (SRS) – Document system functionality.
Choose a Development Methodology – Agile for flexibility, Waterfall for structured development.
Plan the Architecture – Define system components and tech stack.
Tools:
Project Management: Jira, Trello, Asana
Documentation: Confluence, Notion
Step 3: Designing the Software Architecture
This phase involves structuring the application.

Types of Architectures:
Monolithic – Single-tiered structure (small apps).
Microservices – Modular approach, scalable (large apps).
MVC (Model-View-Controller) – Separates data, logic, and UI.
Activities:
Wireframing UI/UX design using Figma or Adobe XD.
Defining database schema and API endpoints.
Creating technical specifications.
Step 4: Development (Coding & Implementation)
The actual coding begins based on the design phase.

Frontend Development:
Uses HTML, CSS, JavaScript (React, Angular, Vue.js).
Focus on responsive and interactive UI.
Backend Development:
Server-side logic using Python (Django, Flask), Java (Spring Boot), or Node.js.
APIs using REST or GraphQL.
Database Management:
SQL: MySQL, PostgreSQL
NoSQL: MongoDB, Firebase
Version Control:
Use Git for collaboration (GitHub, GitLab, Bitbucket).
Step 5: Testing and Debugging
Before deployment, software needs rigorous testing.

Types of Testing:
Unit Testing – Tests individual components.
Integration Testing – Ensures different modules work together.
Performance Testing – Checks system speed and reliability.
Security Testing – Identifies vulnerabilities.
Tools:
Selenium, Jest (for frontend).
JUnit, PyTest (for backend).
Postman for API testing.
Step 6: Deployment and Hosting
Once testing is successful, software is deployed.

Deployment Process:
Choose a Hosting Platform – AWS, Azure, Google Cloud, Heroku.
Use CI/CD Pipelines – Automate deployment using Jenkins, GitHub Actions.
Configure Server and Security – Implement SSL, firewalls, and monitoring.
Launch in Phases – Start with beta testing before full release.
Step 7: Maintenance and Updates
Post-deployment, software needs continuous improvement.

Key Activities:
Fix bugs reported by users.
Monitor performance and optimize load handling.
Release updates with new features and security patches.
Tools:
Logging: ELK Stack, LogRocket.
Monitoring: Prometheus, Grafana.

APP DEVELOPMENT

App Development: A Complete Guide
Introduction
In today’s digital world, mobile applications play a crucial role in connecting businesses with customers. Whether it’s a startup or an established company, having a well-designed app can enhance user engagement and drive revenue. But what does it take to build a successful app? This guide will walk you through the key steps of app development, from ideation to deployment.

  1. Planning Your App
    Before writing a single line of code, proper planning is essential. This stage includes:

Defining Objectives: What problem does your app solve?
Market Research: Who are your competitors? What features do users expect?
Target Audience: Identifying the users and their pain points
App Features & Functionality: Listing core and advanced features
Choosing the Right Platform: iOS, Android, or cross-platform?

  1. Choosing the Tech Stack
    The choice of technologies depends on the type of app:

Native Apps:
Android (Kotlin, Java)
iOS (Swift, Objective-C)
Cross-Platform Apps:
React Native, Flutter, or Xamarin for both iOS & Android
Backend & Database:
Node.js, Django, Firebase, MongoDB, or MySQL

  1. UI/UX Design
    User experience is key to app success. A well-designed UI ensures smooth navigation and engagement. Best practices include:

Keeping designs simple and intuitive
Using consistent fonts, colors, and branding
Optimizing for responsiveness across devices
Providing clear CTAs (Call to Actions)

  1. Development Process
    Front-End Development
    Implementing the UI using frameworks
    Adding animations and user interactions
    Back-End Development
    Setting up servers and databases
    Handling APIs, authentication, and cloud storage
    API Integration
    Connecting to third-party services (e.g., payment gateways, social media, analytics)
  2. Testing & Debugging
    Before launching, extensive testing ensures the app runs smoothly:

Unit Testing: Checking individual components
Performance Testing: Ensuring speed and responsiveness
Security Testing: Preventing data leaks and vulnerabilities
Beta Testing: Gathering feedback from real users

  1. Deployment & Maintenance
    Once testing is complete, the app is ready for launch:

Publishing: Submit the app to Google Play Store and Apple App Store
Marketing: Promote via social media, SEO, and ads
Continuous Updates: Fix bugs, add new features, and optimize performance

How to generate AI images using Midjourney.

Midjourney is a platform that you can use to create AI art. Here’s how to start using it:

Step 1: Make sure you have a Discord account. Midjourney only works on Discord, so you need to have a login there to use it. If you don’t have an account, you can sign up for free.

Step 2: Visit the Midjourney website and choose “Join the beta”. This will take you to a Discord invite.

Step 3: Accept the Discord invite to Midjourney and continue to Discord.

Step 4: Open your Discord app and select the ship-like Midjourney icon on the left menu.

Step 5: In the Midjourney channels, look for the “Newcomer rooms”. You can choose any of these rooms to start creating AI art.

Step 6: Before you start, keep in mind that you only have a limited number of prompt options available as part of your free trial. You can create around 25 free images. After that, you’ll need to purchase a full membership to continue. If you don’t want to spend any money, it’s best to think about what you want to create on Midjourney. You can type “/help” for some tips.

Step 7: When you’re ready, type “/imagine” in the Discord chat for your newbies room. This will open a prompt field where you can describe the image you want to create. The more detailed your description, the better the AI will be able to produce good results. Be descriptive and include any specific style you want.

Step 8: After a minute, Midjourney will generate several images based on your description. You have several options to continue. Look for the U and V buttons labeled 1 through 4. The numbers correspond to the four images generated by Midjourney. Choose U to upscale the image, or V to create a new image based on the current one. You can also refresh the images if needed. Keep in mind that each choice will use up some of your free prompts.

Step 9: If you like an image and choose to upscale it, you will have more options. You can make variations on the image, upscale it to the maximum before downloading, or redo the light upscale if needed. When you’re finished, you can send the image to yourself by selecting the Envelope emoji and adding it to your chat.

Step 10: If you plan to use Midjourney a lot, you can type “/subscribe” in any bot channel in Midjourney’s Discord. This will create a link that you can follow to pay for a subscription. If you want to know more about Midjourney, you can read the manual, which has a list of commands and advice on how to create images.